Navigating the User Interface
Getting Started with Hedgi
Welcome to Hedgi! We’re excited to help you manage your business finances simply and efficiently. Let’s cover the key steps to get you up and running:
Connecting Accounts
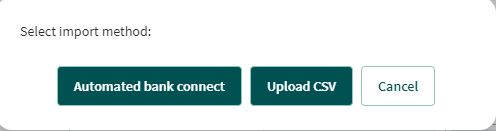
First, connect your business bank accounts so your transactions are imported into Hedgi automatically. Just click “Add Data Source” and select “Automated Bank Connect”. Hedgi uses Plaid for secure and reliable connections.
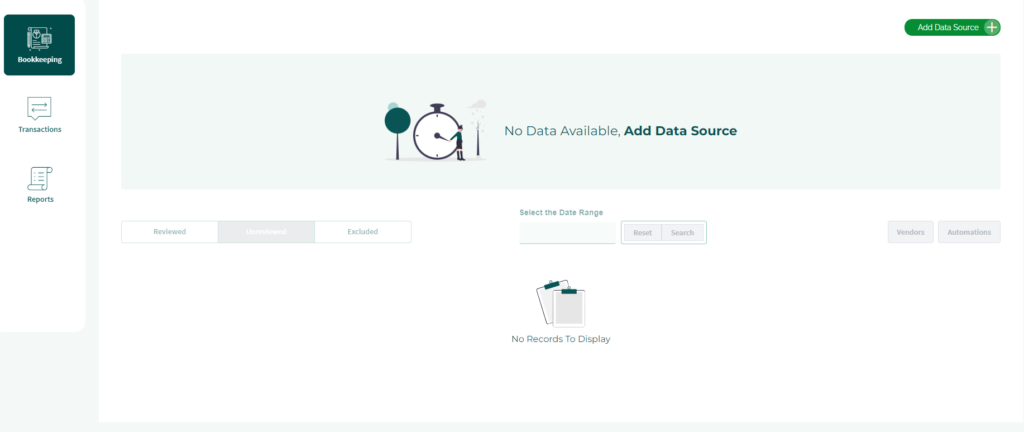
Reviewing Transactions
New transactions will appear in the “Unreviewed” tab. Carefully review each transaction, add any missing details, and categorize appropriately before approving. Approved transactions move to “Reviewed”.

Filtering and Searching
Use Hedgi’s filters to view transactions by date range, description, amount, or category. Search for specific transactions quickly using the search bar. Correct any errors in the “Excluded” tab.
We recommend taking time to properly categorize and approve transactions when you’re getting started. This trains Hedgi’s AI over time for more intelligent automatic categorization.
And that covers the essentials for hitting the ground running! Don’t hesitate to contact our support team if you need any assistance setting up your account or have additional questions. We’re here to help.